A workflow is a sequence of steps describing the life cycle of a document.
Workflows can automate your business processes such as reviewing documents, approving invoices and publishing company policies on an intranet.
In AODocs, each workflow step is called a workflow state.
This article describes how to create workflow states:
Tip: Help yourself with our specifications document: Flowchart — Definition of the workflow states and workflow transitions
Learn more: Assessment of your business need > Define workflow States and workflow Transitions
Create a new workflow
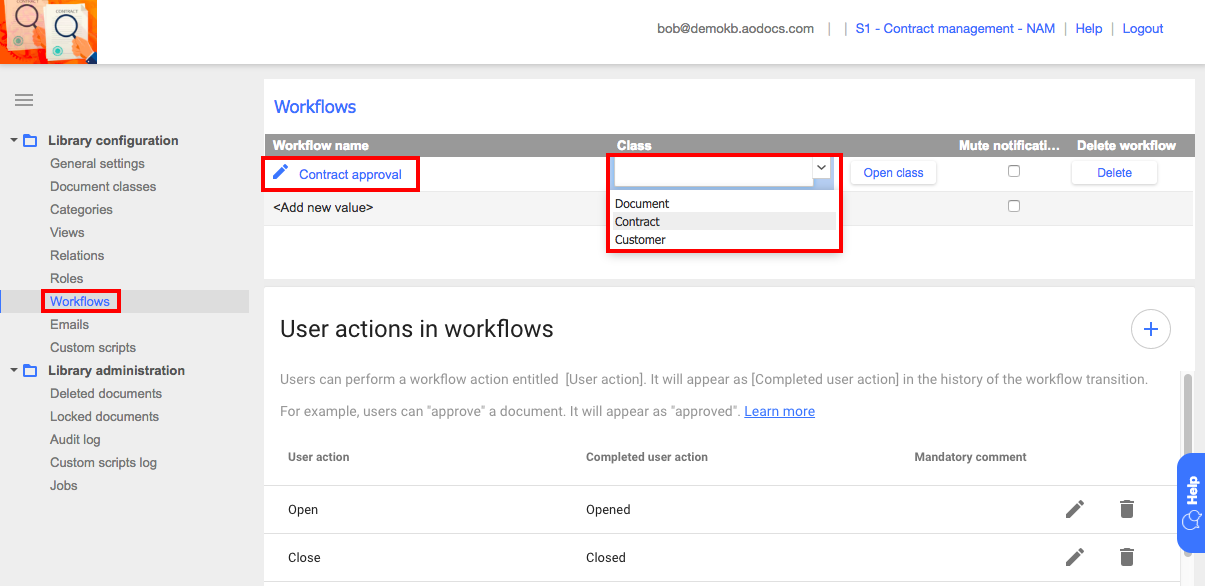
1. Open the library administration interface.
2. Select Workflows.
3. Press Add new value and enter the name of your workflow.
4. Choose a document class for the workflow.
Important: A workflow must be associated with a document class.
5. After creating a new workflow, press the name of the workflow to configure it.
Notes:
- When you create a new document class, there is no workflow assigned to it.
- When you create a workflow and assign it to a document class, all documents of the class will have a workflow state from this point on. Any document which existed before the workflow was created are put in the initial state of the workflow.
- You can’t "detach" a workflow from a class — if you want to stop using the workflow, you have to delete it. In this case the workflow state metadata is lost on all existing documents.
- If you want to use the workflow for only a subset of documents in your class, you are recommended to create a special workflow state, with no transition and with the option Hidden from workflow tasks, where you put all the documents that aren’t used in the workflow.
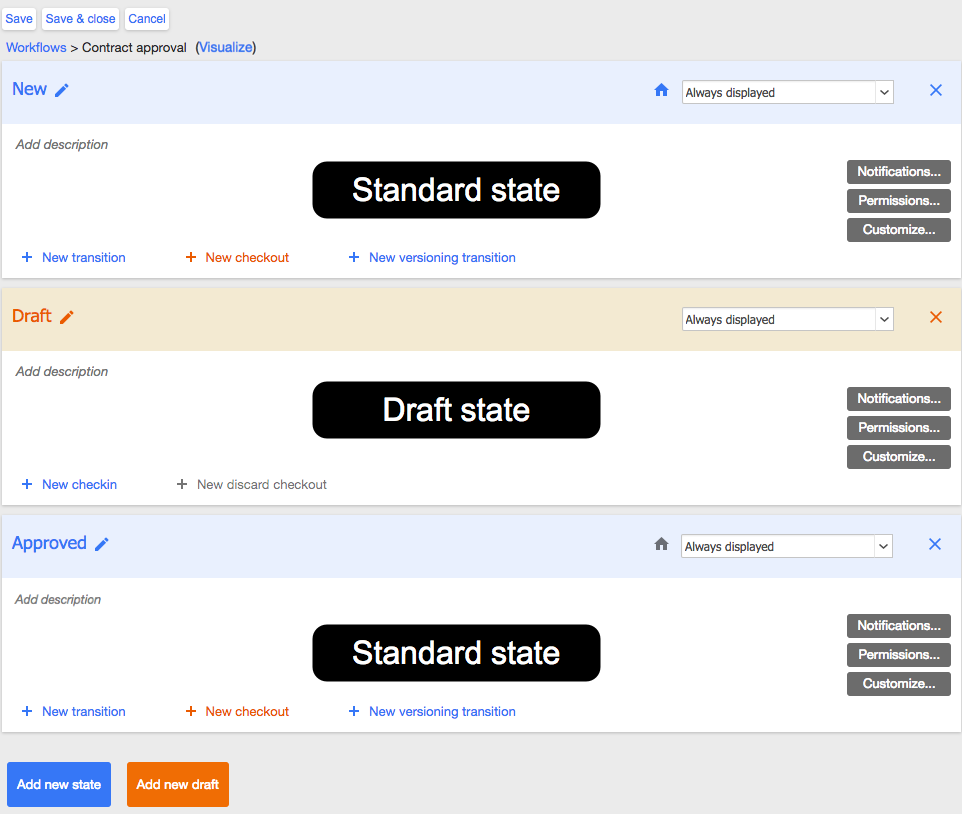
Types of workflow state
There are two types of workflow state:
- Standard state: in this state, the document has one current version.
- Draft state: in this state, the document has two versions:
- Draft version: this version is the one in draft state. It can be viewed and edited by the people defined in the permissions of the draft workflow state.
- Main version: this version of the document remains in the last standard state the document was in. It is read-only for all the people defined in the permissions of the draft workflow state.
Note: Draft states are used to automate check-out / check-in in a workflow.
Configure workflow states
A new workflow contains a single workflow state called Initial State, which is the start point of the workflow. Any new document created in the document class is automatically put in this Initial State.
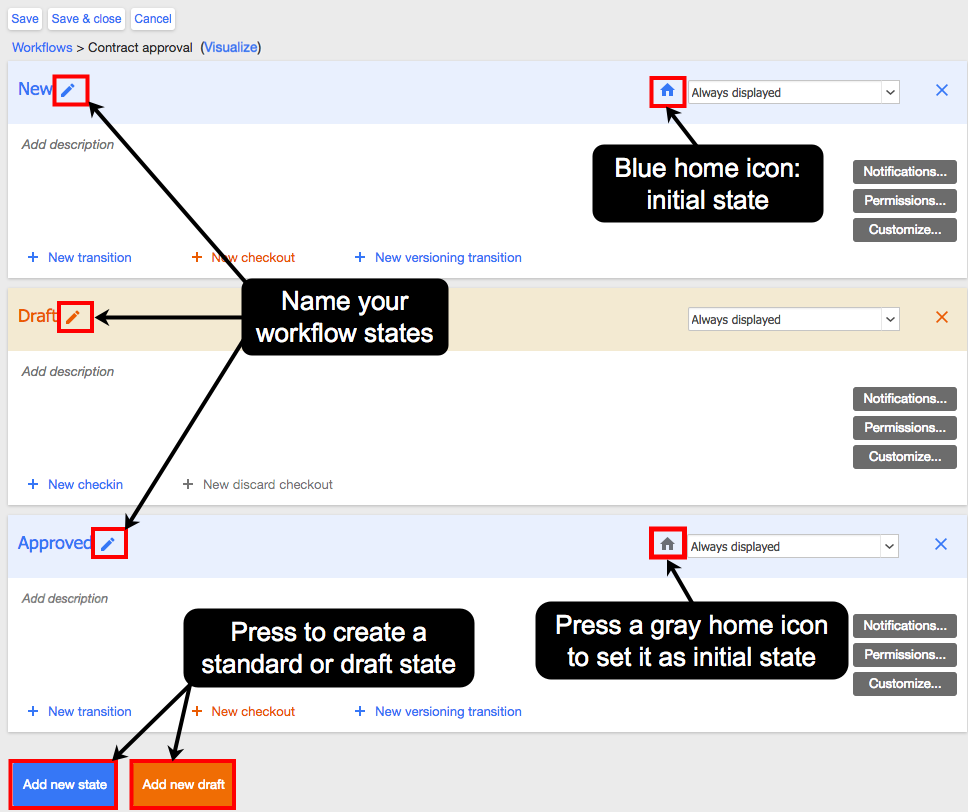
1. In the workflow configuration interface, rename the Initial State if needed.
2. Press Add new state to create a standard state or Add new draft to create a draft state.
3. Name the workflow state you have just created.
4. Repeat step 2 and 3 until all you have created all the workflow states you need.
5. You can select any workflow state as the workflow’s initial state by pressing the home button.
Note: The initial state must be a standard state.
6. You can re-order the workflow states by drag-and-drop.
Note: If you have configured a view with the Browse by option set to Workflow state, the workflow states in the view will be displayed in the same order as they appear in the workflow configuration screen. Learn more: Configure views in your library
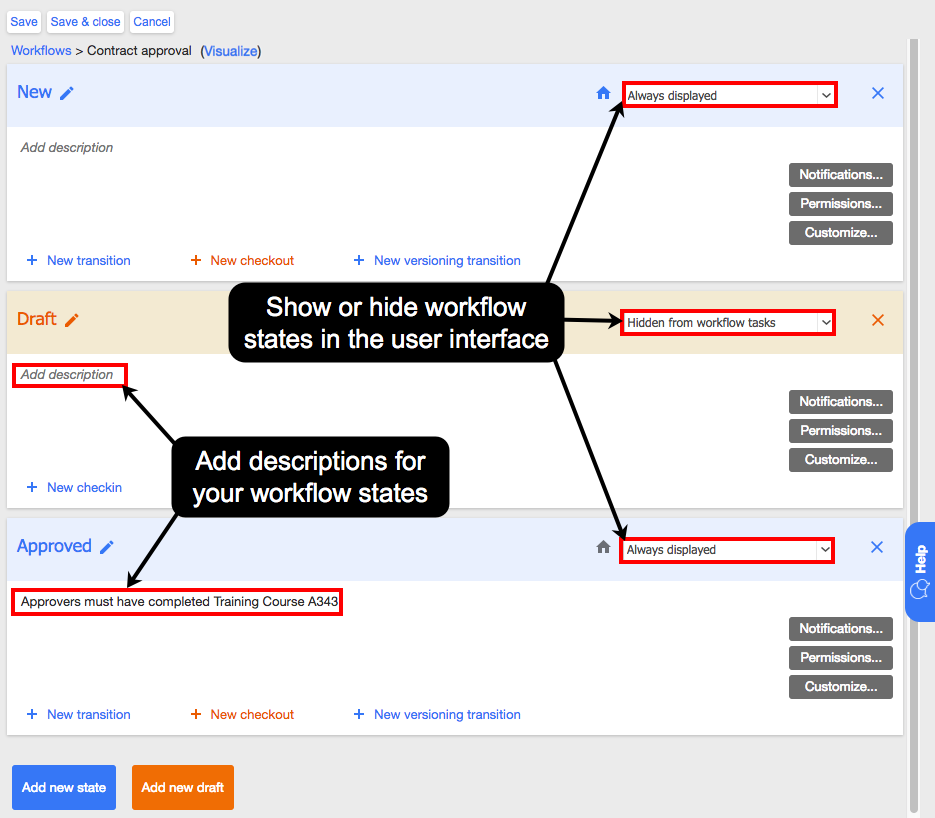
7. You can choose to hide or show the workflow states from your end-users by selecting the visibility of the workflow state:
- Always displayed: this is the default — the workflow state is displayed in all user interfaces.
- Hidden from workflow tasks: the workflow state is hidden from the workflow section in the library homepage and the list of pending workflow actions.
- Never displayed: the workflow state is hidden from the workflow section in the library homepage and from views configured with Browse By or Filter based on workflow states.
Tips:
- The visibility option Never displayed can be useful to hide technical workflow states that trigger reminders or customisations.
- The visibility option Hidden from workflow tasks can be useful for workflow actions that don't follow a timeline.
Learn more:Configure views in your library and Browse the workflow tasks in your library
8. If required, press Add description and add descriptions for your workflow states. The descriptions appear in the pop-up menu when you force the workflow to a different state without a transition.
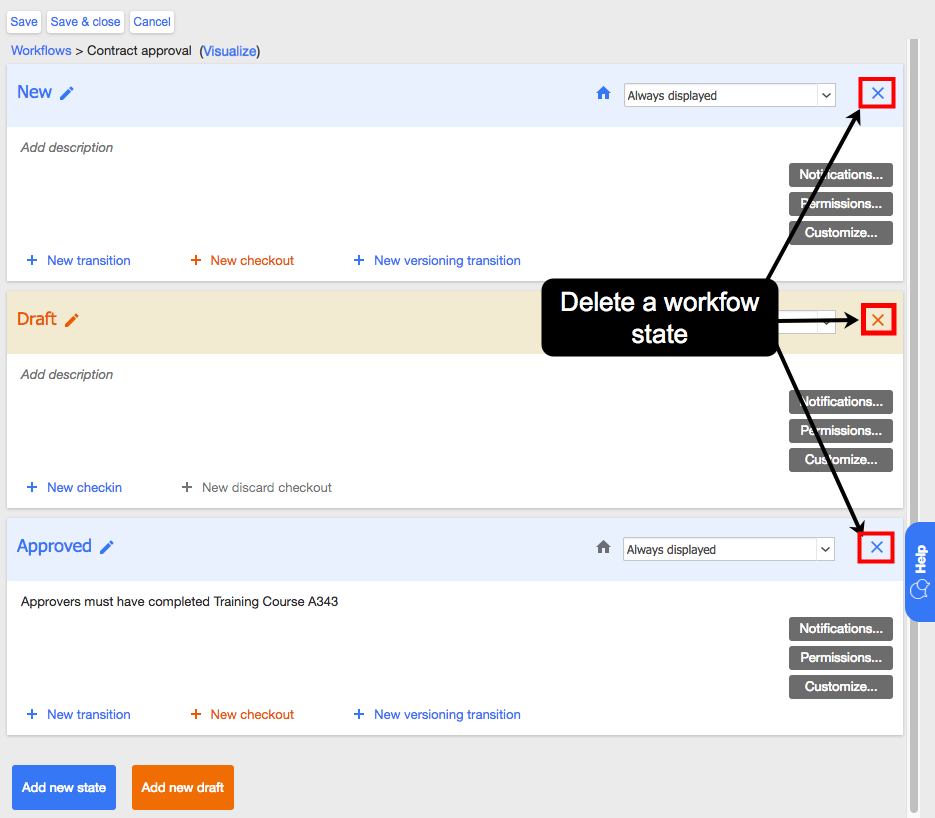
9. Press the cross on the top right of a workflow state to delete it.
Note: You can’t delete a workflow state if:
- it is the initial state
- it is referenced in a transition from another workflow state
- it is defined in the configuration of a view
- documents in the library are in this workflow state
10. Press Save and Close.