To create a document in a Document Management library:
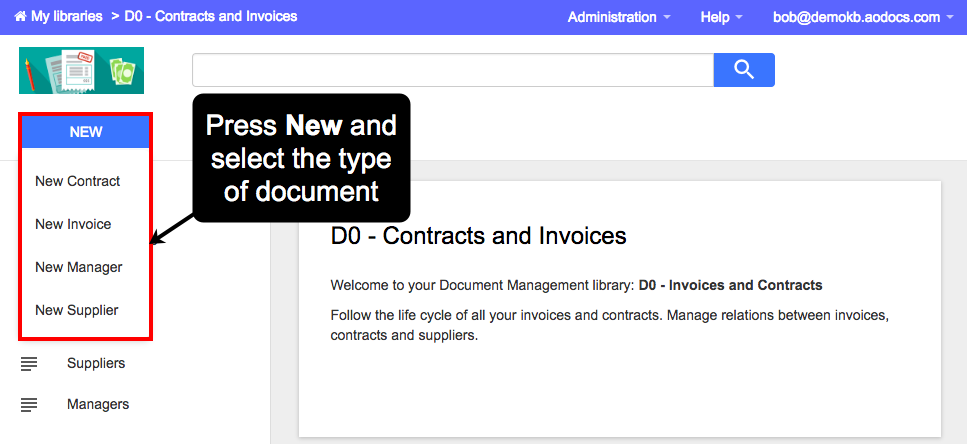
1. Access your library and press New on the library homepage or in a view.
2. Select one of the document classes configured by the library administrators.
Note: If there is only one document class in your library, the document opens in edit mode directly.
3. Fill in the title and properties of your document.
A progress bar indicates how many mandatory fields have been filled in. The mandatory properties are marked with a red star.
When filling in properties, you can use the help text to guide you. The default help text indicates the type of data to enter (for example, numerical value or text). If your library administrator has customized the help text, it will contain information specific to your business case.
In addition, if your library administrator has defined tooltips, hover over the question mark next to the property name for additional help.
Note: You can't save your document:
- without filling in all mandatory fields
- if some property values are outdated or incorrect
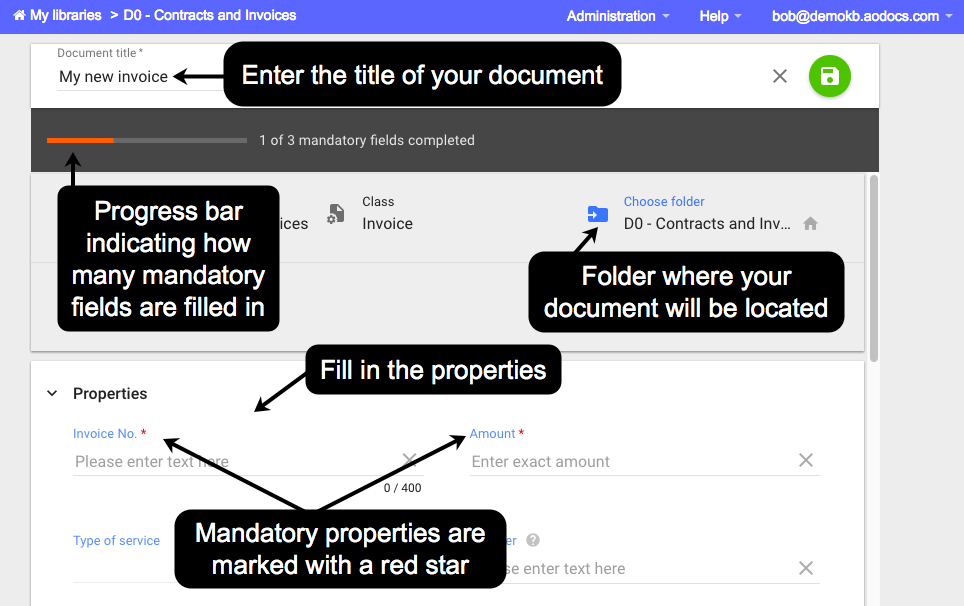
4. If the document class in your Document Management library has a folder structure, you can change the folder where your document will be located.
The default folder is:
- the library root if you created the document from the library homepage or from a view without a folder structure
- the current folder if you created the document from a view with a folder structure
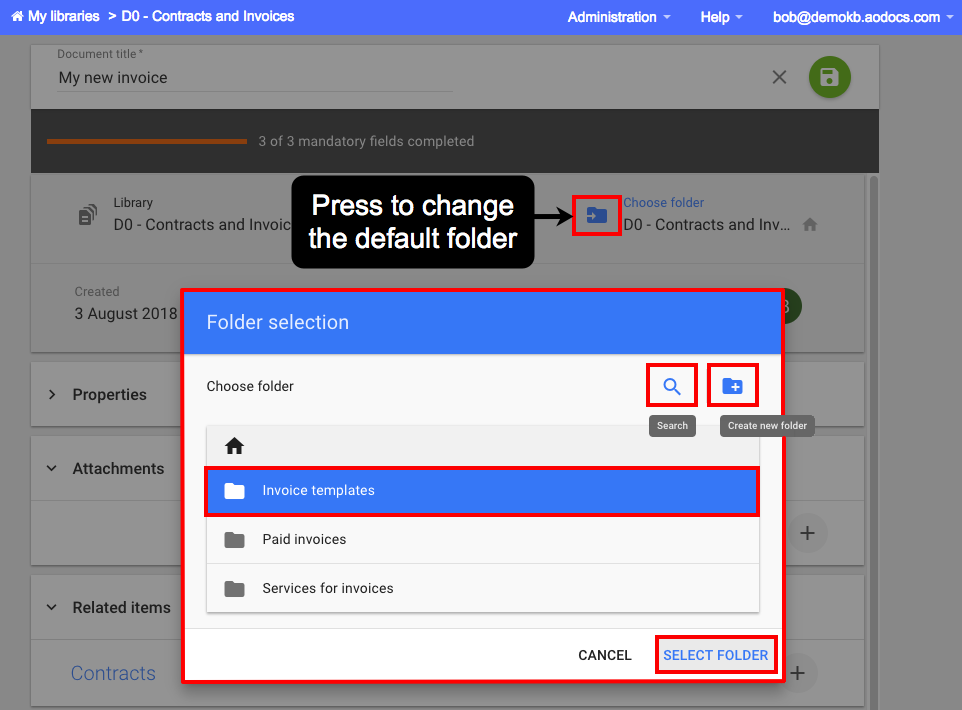
Press the Choose folder button. In the Folder selection pop-up, select the required folder and press Select Folder.
Tip: You can search for folders and create new folders in your folder structure.
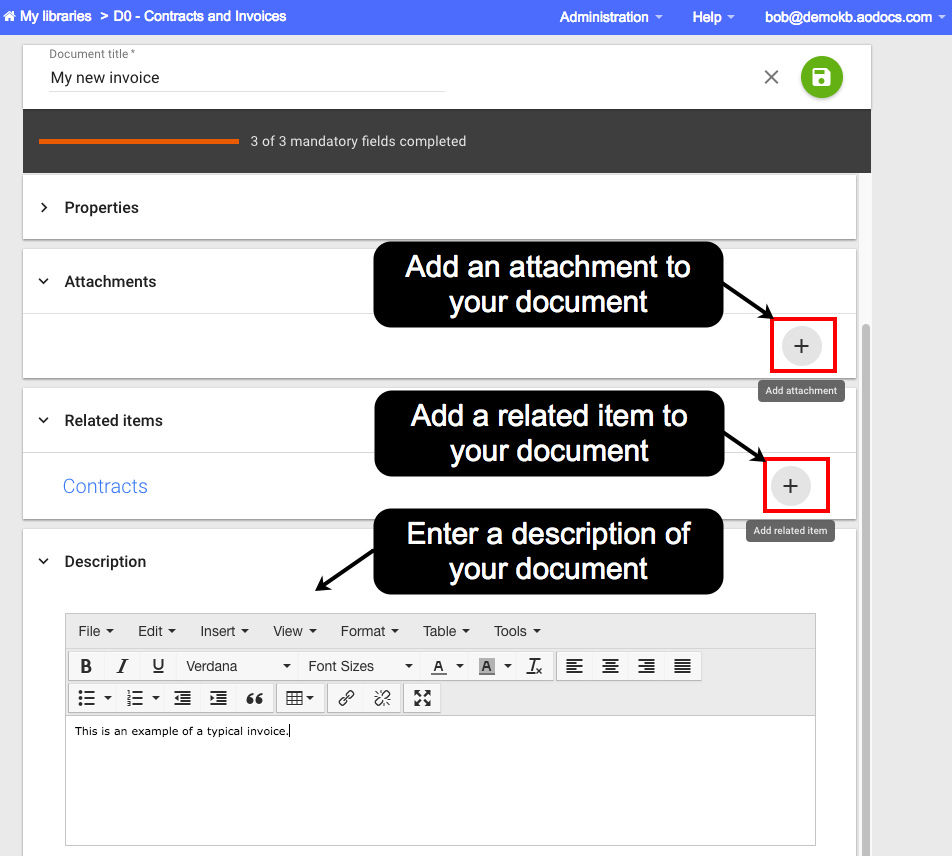
5. If required, attach one or more files to the document. You can:
- Attach a file from your Google Drive or computer
- Upload and convert a Microsoft Office file from your computer — the file will be converted to the corresponding Google format
- Create a new Google file (Docs, Sheets or Slides)
Learn more: Manage attachments in Document Management libraries.
Notes:
- In Document Management libraries, you can create documents with no attachments, one attachment or several attachments.
- Once you've saved your document, you can add attachments by drag and drop directly into the Properties panel.
6. If relations have been set up by a library administrator, you can press the Add related items button and add one or more relations. Learn more: Use related items.
Note: Once you've saved your document, you can add relationed items in the Properties panel without entering edit mode.
7. If required, add a description to your document. The rich text field can include:
- links
- tables
- images
- videos
- embedded external content with iframes
The description is displayed in the Properties panel of the document. The text in the description is searchable by the AODocs search bar.
Notes:
- The description field may be mandatory if the field permissions are managed by workflow states.
- You can only insert images in the description once you have saved your document.
8. Press the Save button to create your document.